The iPhone Maps app can help you get from here to there, whether you're walking, driving, or using public transportation. If you're ready to stretch your legs, follow these instructions for finding walking directions on your iPhone.
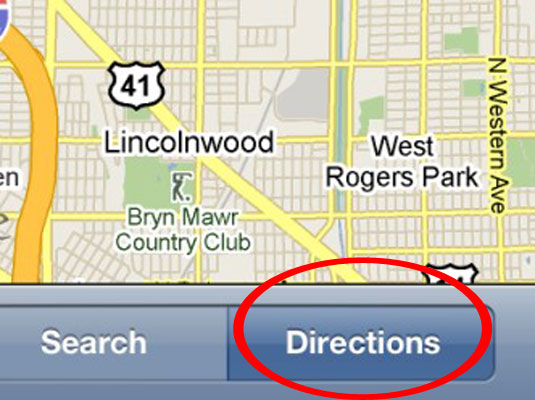

1
Tap the Directions button at the bottom of the map screen.
The Start and End fields appear at the top of the screen.
2
Type the start and end points.
Alternatively, select them from your bookmarks, recent maps, or contacts, if you prefer. Weird but true: If you type the end location, you’ll have to tap the Route button before you can perform the next step; but if you select the end location from your Bookmarks, Contacts, or Recents list, the Route button doesn’t appear and thus doesn’t need to be tapped before you perform the next step.
3
If you want to swap the starting and ending locations, tap the little swirly arrow button to the left of the Start and End fields.
This nifty feature can help you find your way back.
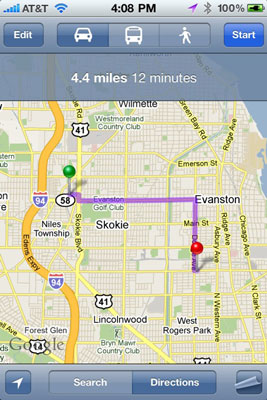
4
When the start and end locations are correct, tap the Route button in the bottom-right corner of the screen.
The route map appears. If you need to change the start or end location, tap the Edit button in the top-left corner and type a new start or end location in the appropriate field. The screen that appears has three icons near the top: a car, a bus, and a person walking. Directions by car is the default.

5
For step-by-step walking directions, tap the person-walking icon.
Walking directions generally look a lot like driving directions, except for your travel time.
No comments:
Post a Comment